Das eingestellte Subnetz muss frei bzw. bisher ungenutzt sein.
YaST2 - lan @ i5
Network Card Setup
┌General──Address──Bridged Devices───────────────────────────────────┐
│ Device Type Configuration Name │
│ Bridge▒▒▒▒▒▒▒▒▒▒▒▒▒▒▒↓ br1▒▒▒▒▒▒▒▒▒▒▒▒▒▒▒▒▒▒▒▒▒▒▒▒▒▒▒▒▒▒▒▒▒▒▒▒▒▒ │
│( ) No Link and IP Setup (Bonding Slaves) │
│( ) Dynamic Address DHCP▒▒▒▒▒▒▒▒▒▒↓ DHCP both version 4 and 6▒↓ │
│(x) Statically Assigned IP Address │
│IP Address Subnet Mask Hostname │
│192.168.1.254▒▒▒▒▒▒ /24▒▒▒▒▒▒▒▒▒▒▒▒▒▒▒▒▒ kvmhost▒▒▒▒▒▒▒▒▒▒ │
│┌Additional Addresses──────────────────────────────────────────────┐│
││ ┌──────────────────────────────────────────────────────────┐ ││
││ │IPv4 Address Label│IP Address│Netmask │ ││
││ │ │ ││
││ │ │ ││
││ └──────────────────────────────────────────────────────────┘ ││
││ [Add][Edit][Delete] ││
│└──────────────────────────────────────────────────────────────────┘│
└────────────────────────────────────────────────────────────────────┘
[Help] [Back] [Cancel] [Next]
F1 Help F3 Add F9 Cancel F10 Next
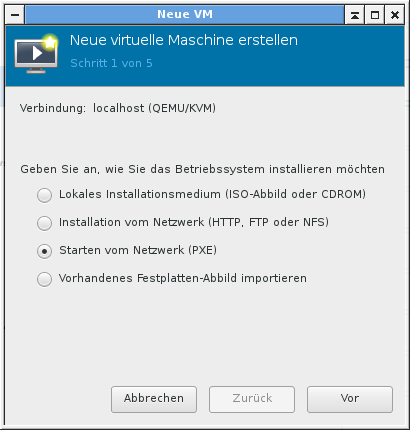
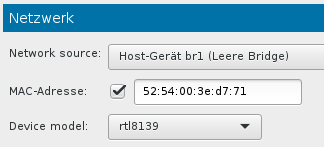
Nach einem Reboot des KVM-Hosts kennt KVM eine neue "Network source".
YaST2 - lan @ i5
Network Card Setup
┌General──Address──Bridged Devices───────────────────────────────────┐
│┌Bridged Devices───────────────────────────────────────────────────┐│
││[ ] enp3s0 - RTL8111/8168 PCI Express Gigabit Ethernet controller ││
││[ ] wlan0 - 802.11n WLAN NIC configured ││
││ ││
││ ││
│└├──────────────────────────────────────────────────────┤──────────┘│
└────────────────────────────────────────────────────────────────────┘
[Help] [Back] [Cancel] [Next]
F1 Help F9 Cancel F10 Next
| ssh-copy-id
PXEserver ssh PXEserver su apt-get install sudo nano /etc/sudoers |
und weiter:
dede ALL=(ALL) NOPASSWD: ALL
| nano
/etc/motd nano /etc/default/grub # GRUB_TIMEOUT=1 update-grub apt-get install iftop htop nmap fping whois sshfs rcconf cd nano .bashrc # Kommentar-Zeichen vor alias weg exit cd nano .bashrc # Kommentar-Zeichen vor alias weg sudo init 0 |
| sudo nano
/etc/network/interfaces |
auto eth1
iface eth1 inet static
address 192.168.1.1
netmask 255.255.255.0
| sudo reboot ssh PXEserver |
Jetzt kann dnsmasq installiert werden. Und iptables für die Gateway-Funktionalität gleich dazu:
dede@PXEserver:~$ sudo route
Kernel-IP-Routentabelle
Ziel Router Genmask Flags Metric Ref Use Iface
default fritz.box 0.0.0.0 UG 0 0 0 eth0
192.168.1.0 * 255.255.255.0 U 0 0 0 eth1
192.168.178.0 * 255.255.255.0 U 0 0 0 eth0
| sudo apt-get
install dnsmasq iptables sudo service dnsmasq stop sudo nano /etc/dnsmasq.conf |
Aktivieren mit:
interface=eth1
dhcp-range=eth1,192.168.1.100,192.168.1.150,12h
dhcp-boot=pxelinux.0
enable-tftp
tftp-root=/srv/tftp
| sudo -i mkdir /srv/tftp chmod 775 /srv/tftp/ cd /srv/tftp wget http://ftp.debian.org/debian/dists/jessie/main/installer-amd64/current/images/netboot/netboot.tar.gz tar xzf netboot.tar.gz rm netboot.tar.gz service dnsmasq start |
| nano
/etc/sysctl.conf # das
Kommentarzeichen vor "net.ipv4.ip_forward=1" weg iptables -A FORWARD -s 192.168.1.0/24 -i eth1 -o eth0 -m conntrack --ctstate NEW -j ACCEPT iptables -t nat -A POSTROUTING -o eth0 -j MASQUERADE iptables-save >/etc/iptables.up.rules nano /etc/network/interfaces |
Nach einem
auto lo
iface lo inet loopback
# The primary network interface
allow-hotplug eth0
iface eth0 inet dhcp
post-up iptables-restore < /etc/iptables.up.rules
auto eth1
iface eth1 inet static
address 192.168.1.1
netmask 255.255.255.0
| sudo reboot |